

Photoshop tutorial making a cool glowing logo
 Photoshop tutorial making a cool glowing logo
1.start by creating a new project window. I always make it a bit larger then I need.now type in your prefered text.

2. Use your selection tool and make a elliptical selection around your text, and create a new layer from your layers panel. Then hold down your shift key while pressing backspace, fill the selected area with a default color.
3. Now go to your layers style and add style like in the next couple of images.


4. When thats done, also add an outer glow with its default settings, pree ok, and move your text layer above your elliptical layer.5. Make your text layer about 60% in Opacity.6. We will now add a glass kind of effect to this logo. now make a selection so it covers half of your object, hold down shift and press backspace, fill with the color white.
7. Hold down ctrl (control key) and press the layer with your elliptical object from before, and then hold down ctrl and shift at the same time while pressing i, this will invert your selection. now it delete.
8. Now set the opacity of your glass layer to about 60%
9. Go to the layers style for your glow layer and add values as in this image:
10. Here you see my image, I have been playing around with text and fonts and bend my text to fit the object.And your done.
Labels: logo
Digital flower
 Duplicate this layer, on the new layer apply a Gaussian Blur filter with the radius set to about 4-7 px then duplicate this layer 2 times.
 Select the last three layers you created and merge them (you can go to the Layer menu and choose Merge Layers or CTRL+E).
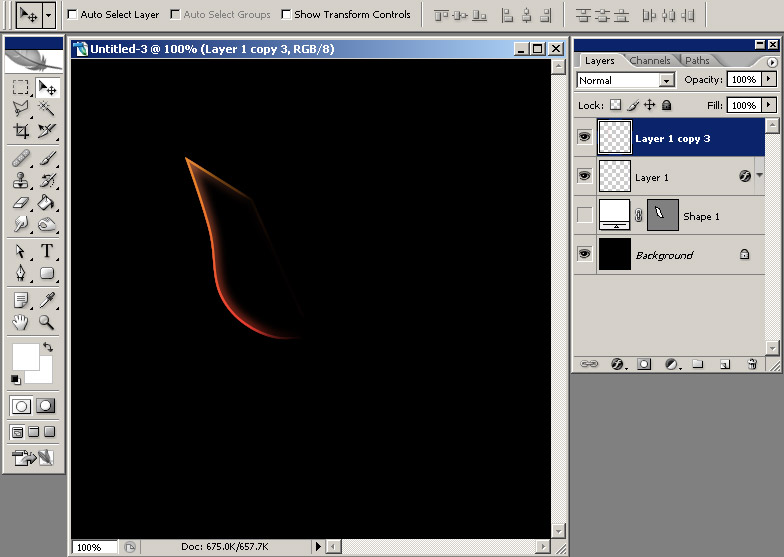 Duplicate this layer again and choose Edit > Free Transform and then right click and choose skew and skew it to right like you see in the picture below:
 Now press CTRL+ALT+SHIFT+T and you should obtain something similar to this:
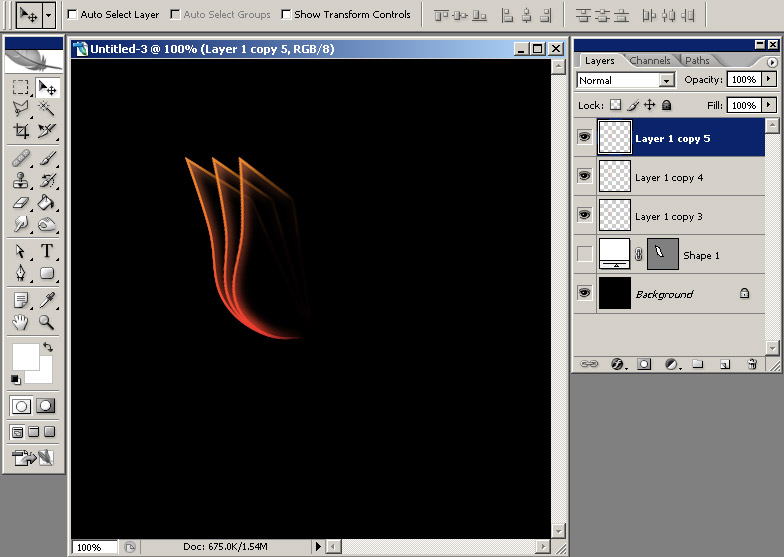 Group the last 3 layers and then duplicate the group and go to Edit > Free Transform and choose Flip Horizontal. Arrange the 2 groups like you see below and you will obtain something that starts to look like a flower:
 Here you can see the 3 layers that a group contains:
 Make a selection aroud the flower:
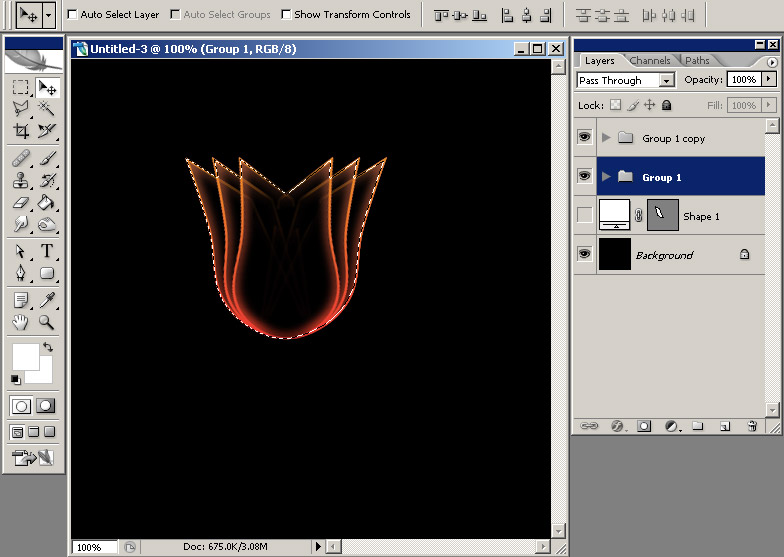 Create a new layer and fill it with a color;it doesn't matter what color, mine is white. This layer should be arranged below all the layers.
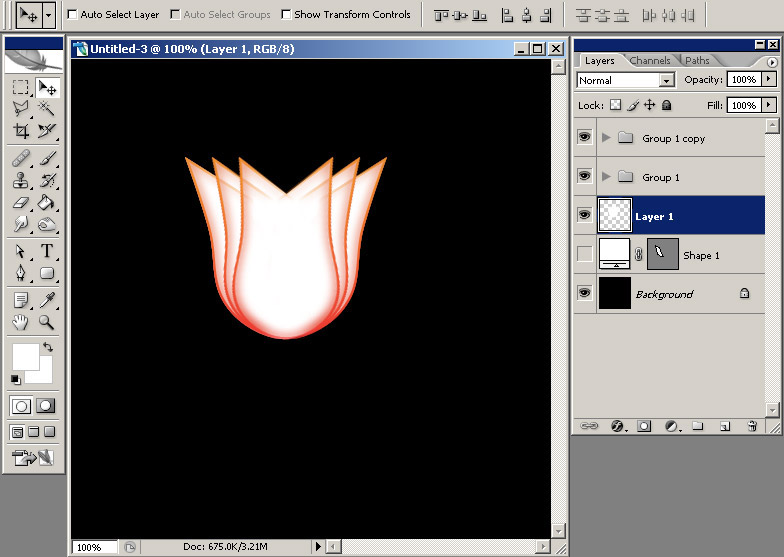 Apply a Gradient Overlay style with these 2 colors: #ff9997 and #fc0100 with a radial style.
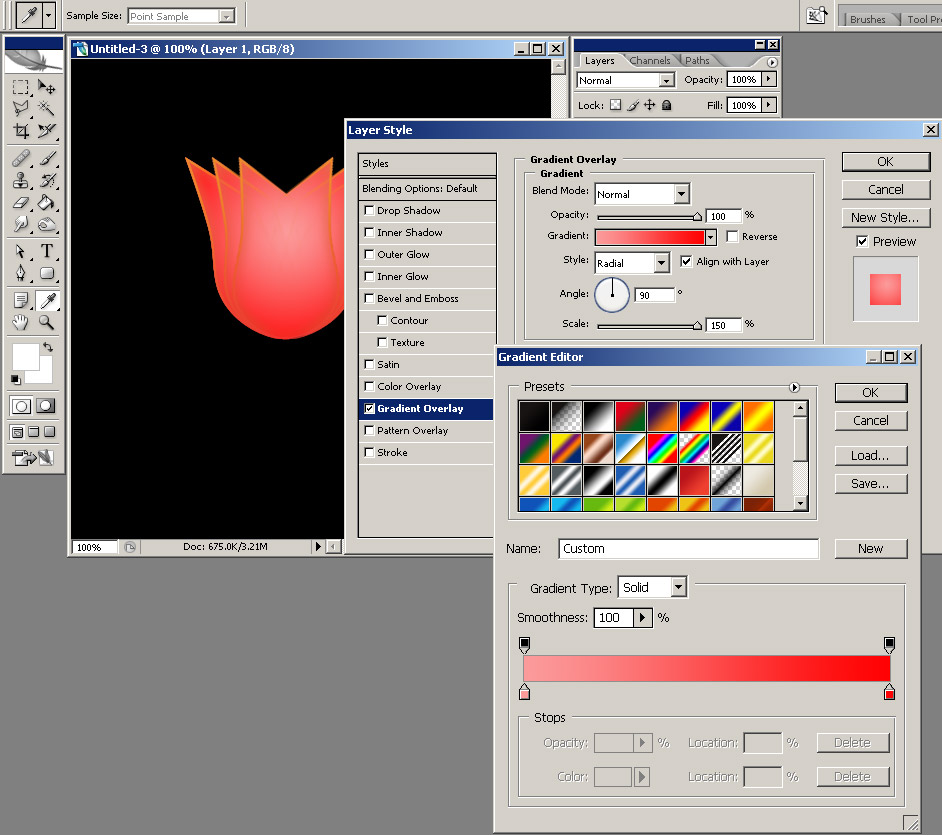 With a Soft Round brush of 90-100 px delete the upper part of this layer and on the sides.
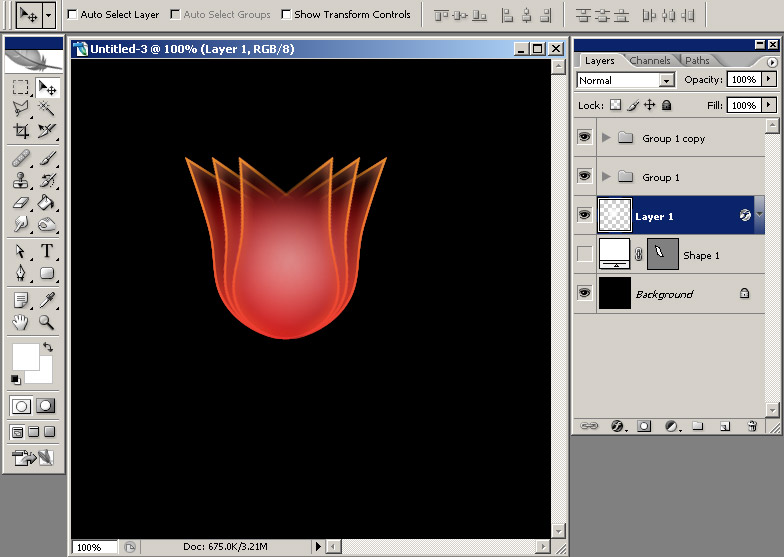 Create a new layer and using the same brush and with the Foreground color set to #f08c2c click once:
 Go to Filter > Blur > Gaussian Blur and choose a higher value for the Radius (I used 35 px).
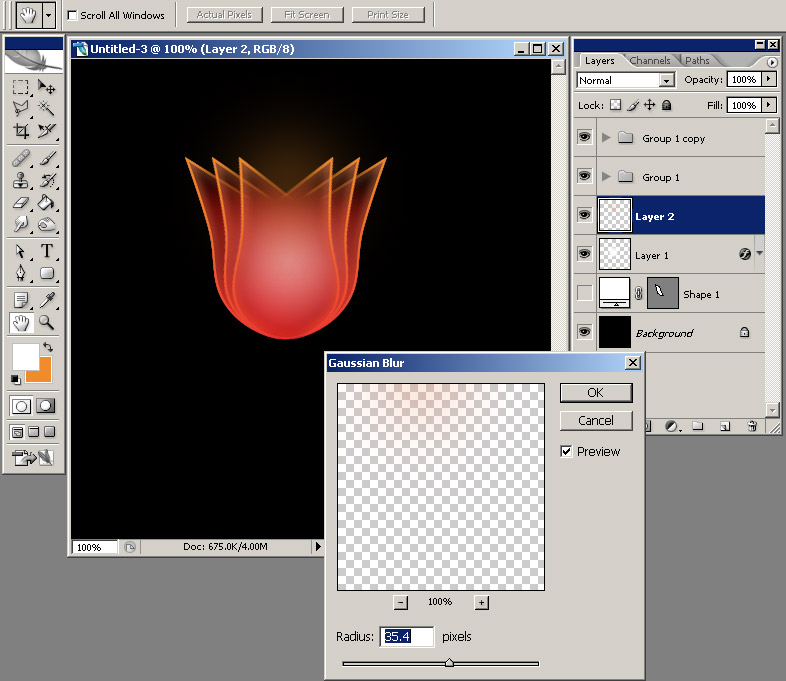 Create a new layer above all the layers and using the same brush and with the Foreground color set to white click again once. You should have something like this:
 You can enhance the saturation of the colors, apply other effects, just let your imagination go free. Here is what I came up with:
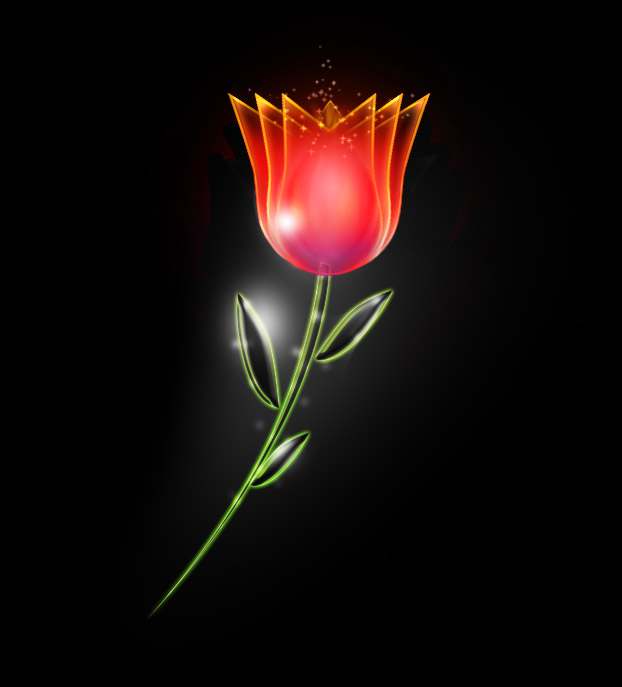
Create realistic ice effect in photoshop
 Aplly Color Overlay style, with the Opacity set to 75% and color set to #abc2e4.
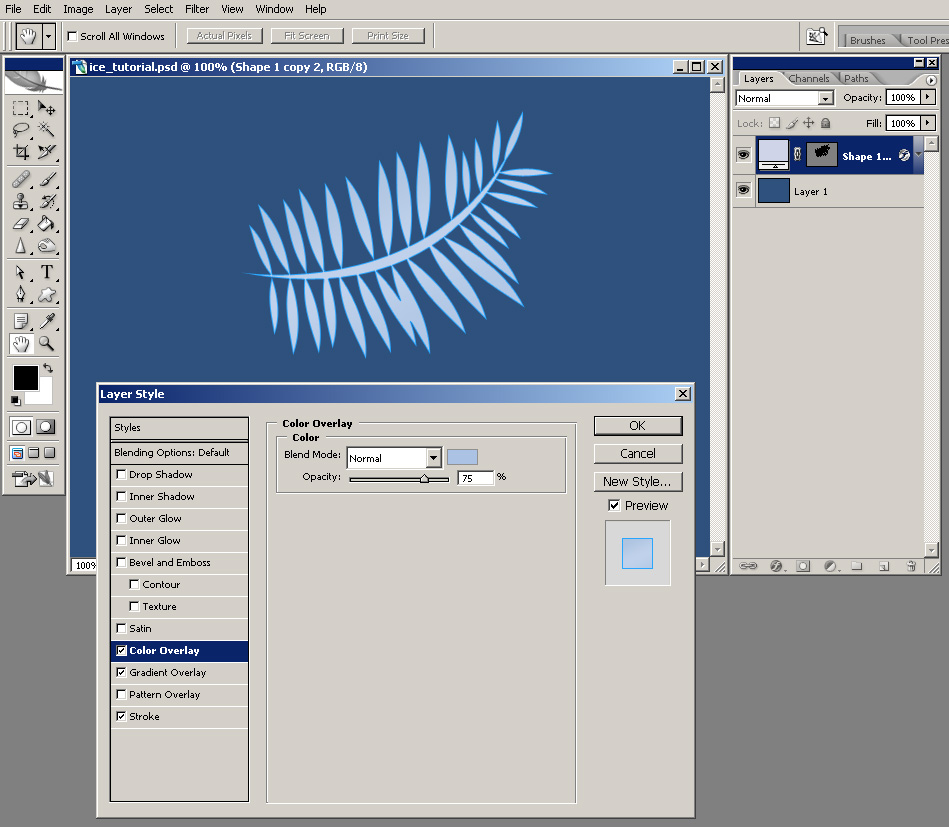 Apply a Bevel and Emboss style, leave all the settings default except your Gloss Contour which should change to Ring and your Shadow mode color which should be set to #3d5286.
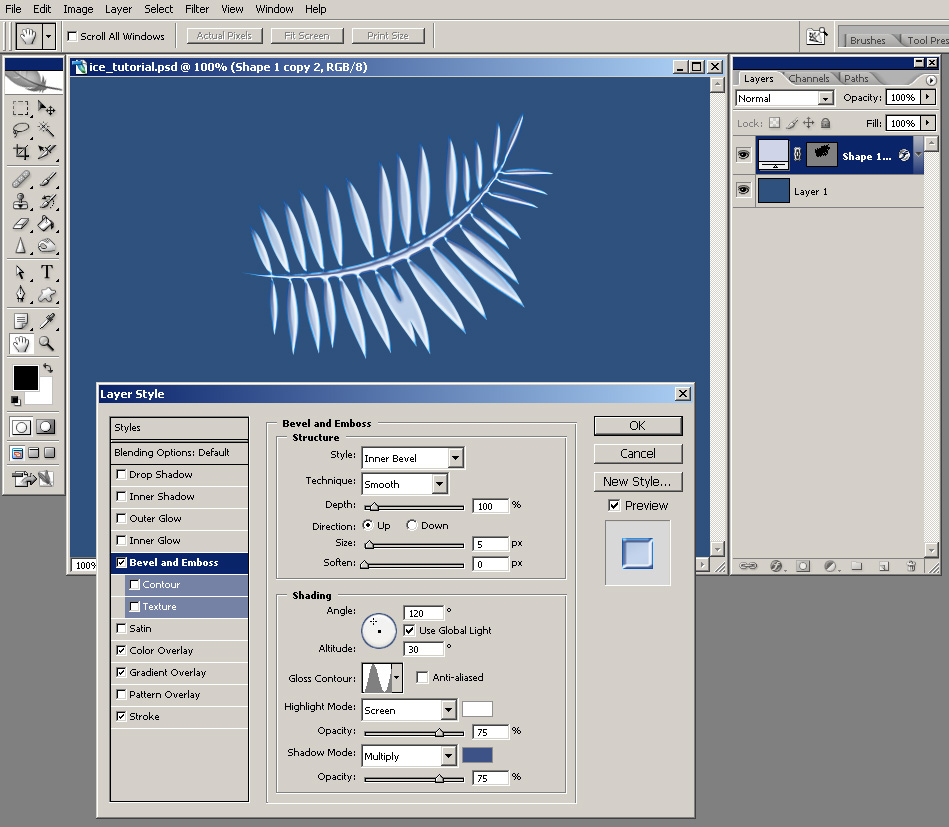 Add a Contour style and set your range to 100%, Contour to Cone and check Anti-aliased.
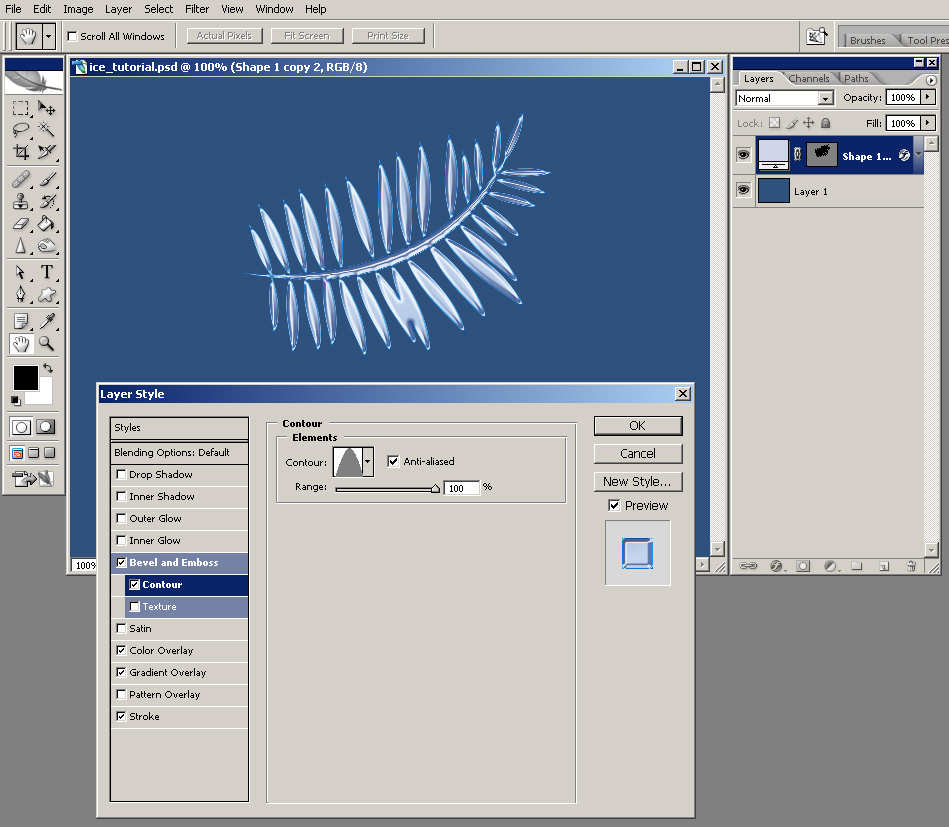 Add Texture, with the Pattern set to Wood and Scale set to 63%.
 Apply a Satin style, but change your Blend Mode to Normal, Opacity to 100% and color to #a6d5f5.
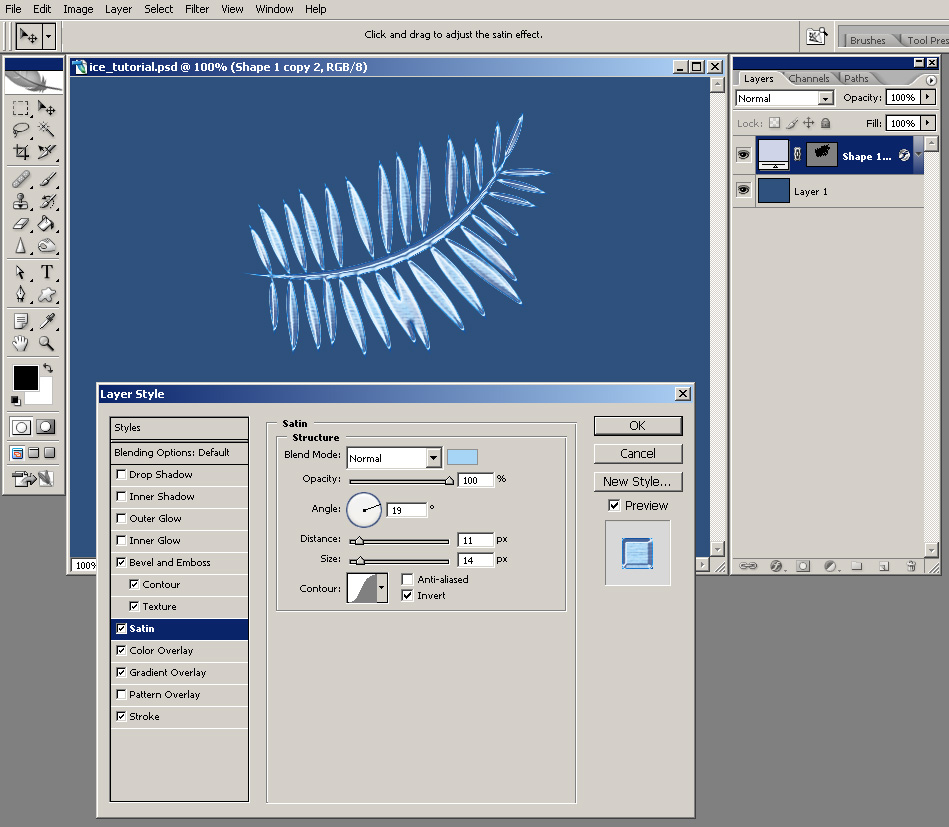 Add a Inner Glow, with the color changed to #2b81d9.
 Add a Outer Glow, with the color changed to #7dd9ff and the Opacity set to 15%.
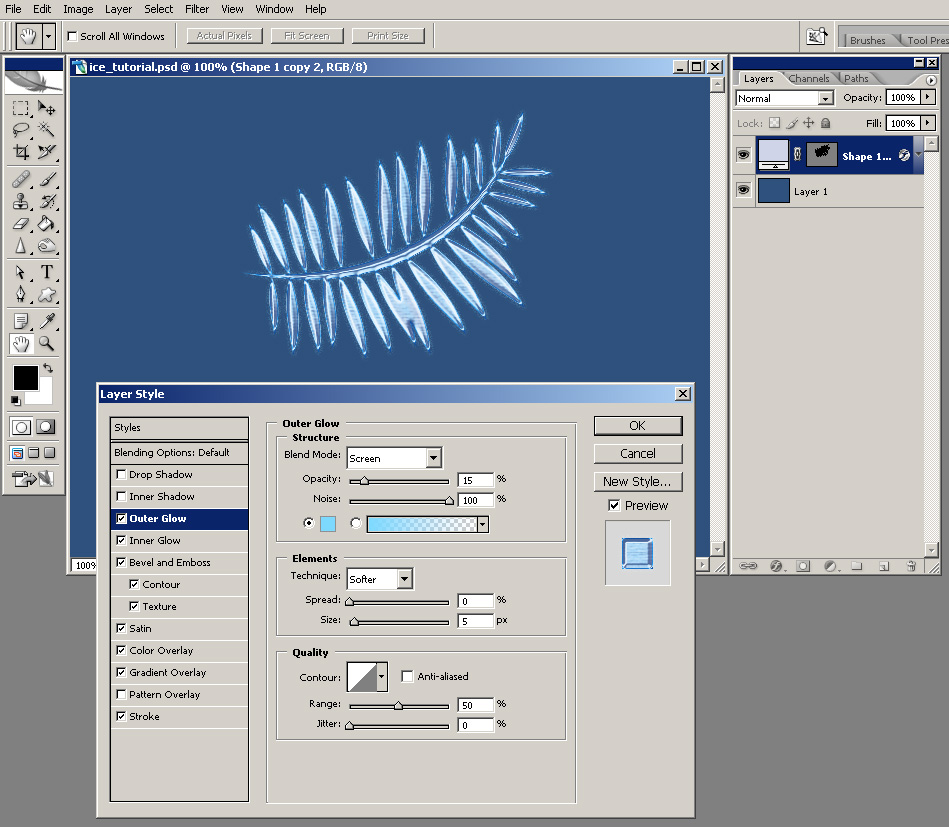 Add a Inner Shadow effect, with the color changed to #484a70.
 Add a Drop Shadow style, with the color set to #1b2a6a, Opacity to 40%. Uncheck Use Global Light and set your Angle to -45 degrees, Distance to 65 px, Spread 5% and Size 100 px.
 Now you have an ice effect that can be easily modified and apllied to any other object you want.
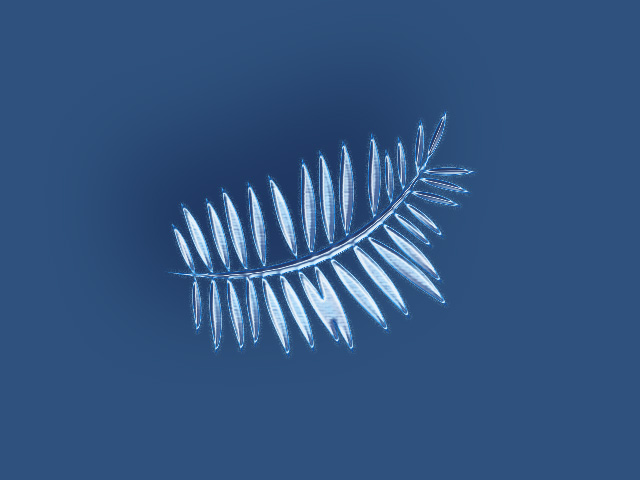 I always try to take my photoshop tutorials a little futher and see what else can I come up with if I am continuously improving an image. Here is what I come up with for this tutorial after adding a few other effects:
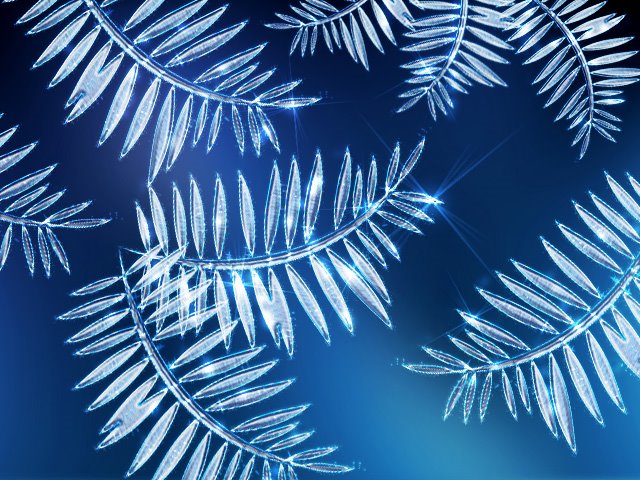
Labels: ice effect
Silk pearl in photoshop
Learn How to create a silk pearl with this photoshop tutorial
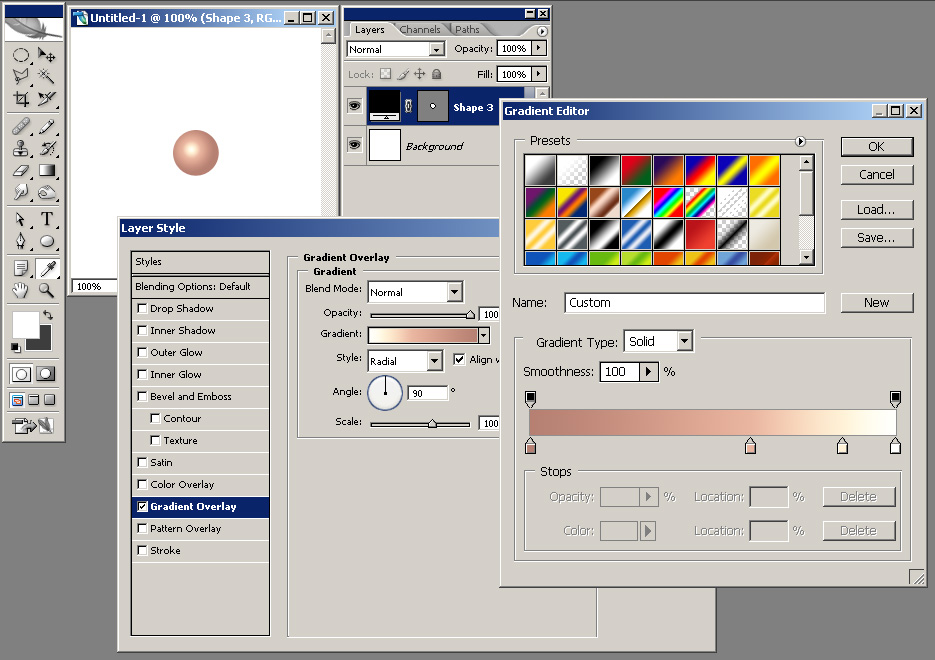
After weeks of waiting I finally come up with a new photoshop tutorial, this time I though I might show you how to make a silk pearl in photoshop.Open a new Photoshop document, mine is 250x250 pixels. Using your Elipse Tool (press and hold the SHIFT key) draw a perfect circle. Now double click your layer in the layer pallete and apply the following styles to it: a Gradient Overlay with the Style set to Radial and a gradient that goes from #b68072 at 0% location to #e9b6a0 at 60% location to #fff1d7 at 85% location and finally to #ffffff at 100% location. Your effects should look similar to this:
 You should also apply a Bevel and Emboss style to it with the style set to Inner Bevel, Technique set to Chisel Hard, Depth 151%, Size 2 px, uncheck use global light and use 38 degrees for Angle and 32 degrees for Altitude. Set the highlight mode to overlay with 100% Opacity and #d1a971 for color and your Shadow mode also to Overlay, with 75% Opacity and #d9b890 as color.
 Now CTRL+click your shape layer in order to bring out its selection then go to Select menu and choose Modify and Contract and insert a value of 2 pixels (this should big as big enough as the size of the Bevel and Emboss style applied to the circle shape layer).
Create a new layer, select the Brush Tool with a Soft Round Brush of 20 px and using black color draw something like you see in the picture below:
 Now put your layer mode to Soft Light and Opacity to 80%.
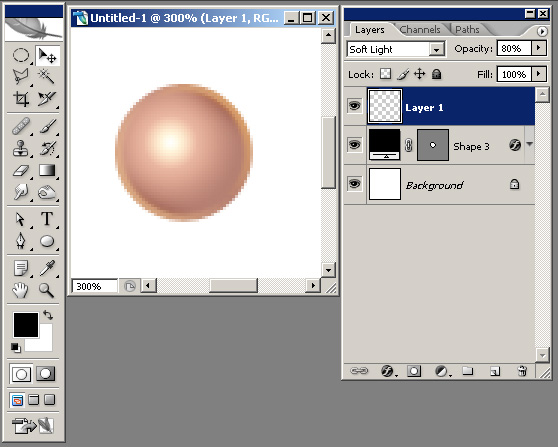 Create a new layer, select the Brush Tool with a Soft Round Brush of 20 px and using white color draw something like you see in the picture below:
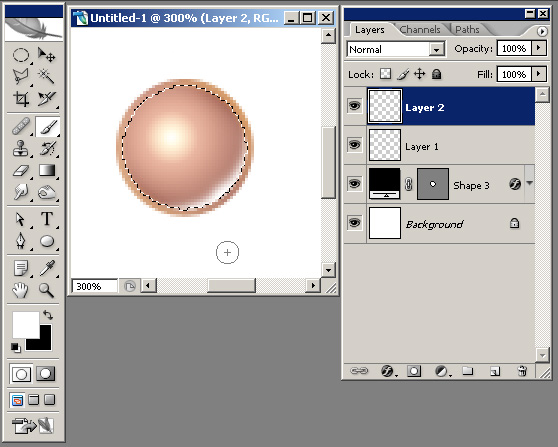 Now put your layer mode to Overlay and Opacity to 80%.
 Now create a new layer and with a Soft Round Brush of 16 px click once on the light part of your sphere and you should have something like this:
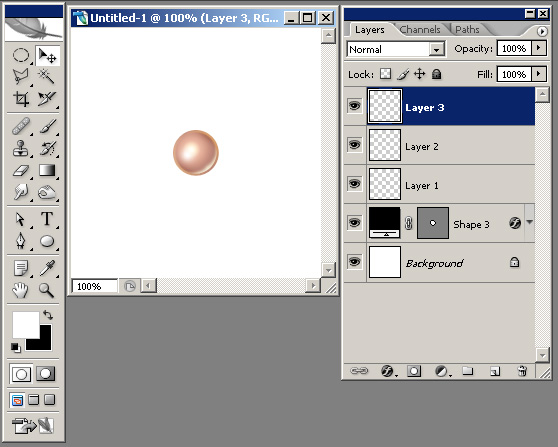 Selecet the layer's Opacity to be 60%.
 Now create a new layer and using your Polygonal Lasso Tool create a star shape and fill it with white:
 Now CTRL+click your shape layer in order to bring out its selection then go to Select menu and choose Modify then Contract and insert a value of 2 pixels (this should big as big enough as the size of the Bevel and Emboss style applied to the circle shape layer) then press CTRL+I in order to invert the selection. Create a new layer above all the layers, select the Brush Tool with a Soft Round Brush of 20 px and draw two white margins like you see in the picture below:
 If you want to take this tutorials a little further, you may try to add more light and shadow to your silk pearls; here is what I come up with:
Labels: pearl
Walkthrough - Quest for the magic wand
See how I work and think, and watch step by step how I create one of my works from concept to completion with this photoshop tutorial.
The work I'm about to show you was done for the Photoshop Cafe Movie Poster Competition. For this poster, I thought at a fantasy movie scenario... a team of adventurers proceeds in a glorious quest to find a magic wand that is supposed to help them save their realm from the forces of evil. I started by making some stars on a night sky:
 Then I've added the hills covered with grass:
 A light behind the hills for contrast:
 Then some clouds added over the light in order to amplify it's effect:
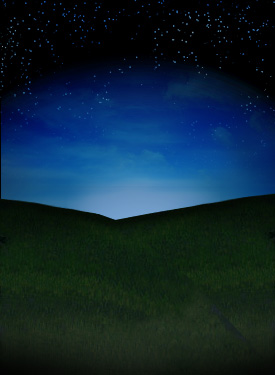 I have then added an unreal planet, something like a big moon, don't forget we still are in a fantasy realm:
 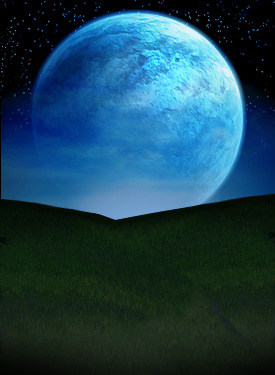 A rock:
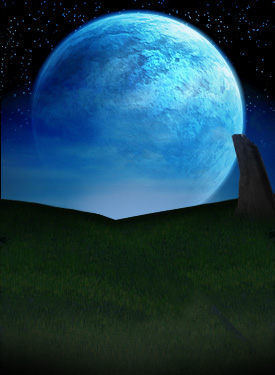 A path and some gravestones and a cross:
 Even more gravestones and crosses:
 Our 4 heroes (I put these just to see how they look like and I will later change them). I like how the silhouettes look in front of the light:
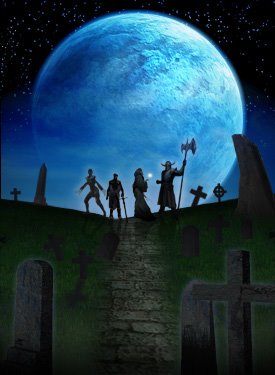 This is starting to be interesting; the wizzard starts using his powers. For higher contrast I used green and yellow colors on the wizzard's spell:
 I've added title and info to make it look more like a poster:
 I've lighten the grass to bring out it's texture and added the shadows. At this point, I am happy with the graveyard look.
Always try to refine your image if you don't like the looks of it, you can always do better; you just have to try until you are satisfied with the result. Add your details gradually:
 I've added more details in the title of the poster to make it pop-up more and I've added the name of the actors:
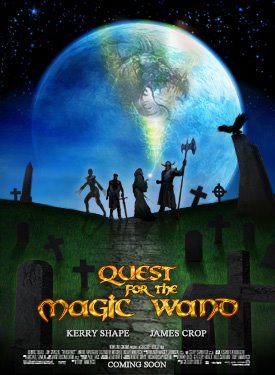 I've changed the 4 heroes and replaced them with others, keeping the silhouette-look, with the light behind:
 In the end, I modified the look of the wizzard's spell because I wanted more contrast and made it look like a phoenix, coming to help our adventurers in their noble quest. I was very happy with the result, but after working on more posters I decided this shouldn't be submitted in the Photoshop Cafe Contest.
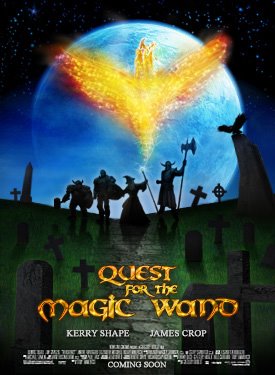
Labels: effect
